5 Tips for Object Placement in AI Images
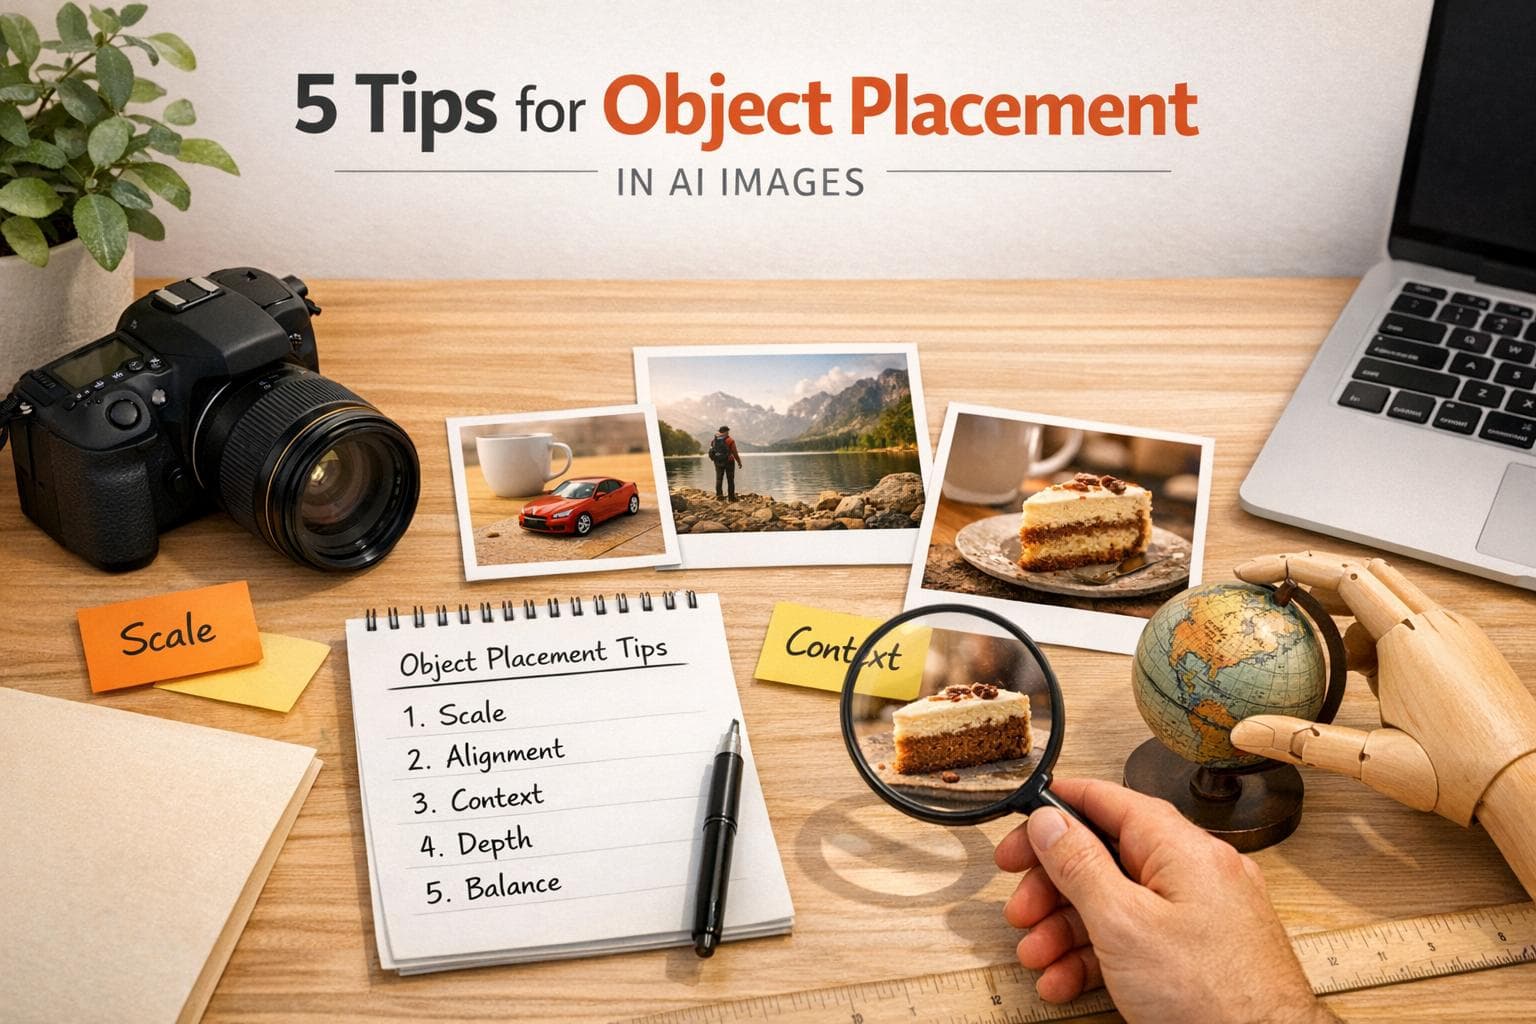
When designing AI-generated images, proper object placement can make or break the realism and impact of your visuals. Misaligned objects or mismatched perspectives can instantly disrupt the scene's believability. Here’s how to get it right:
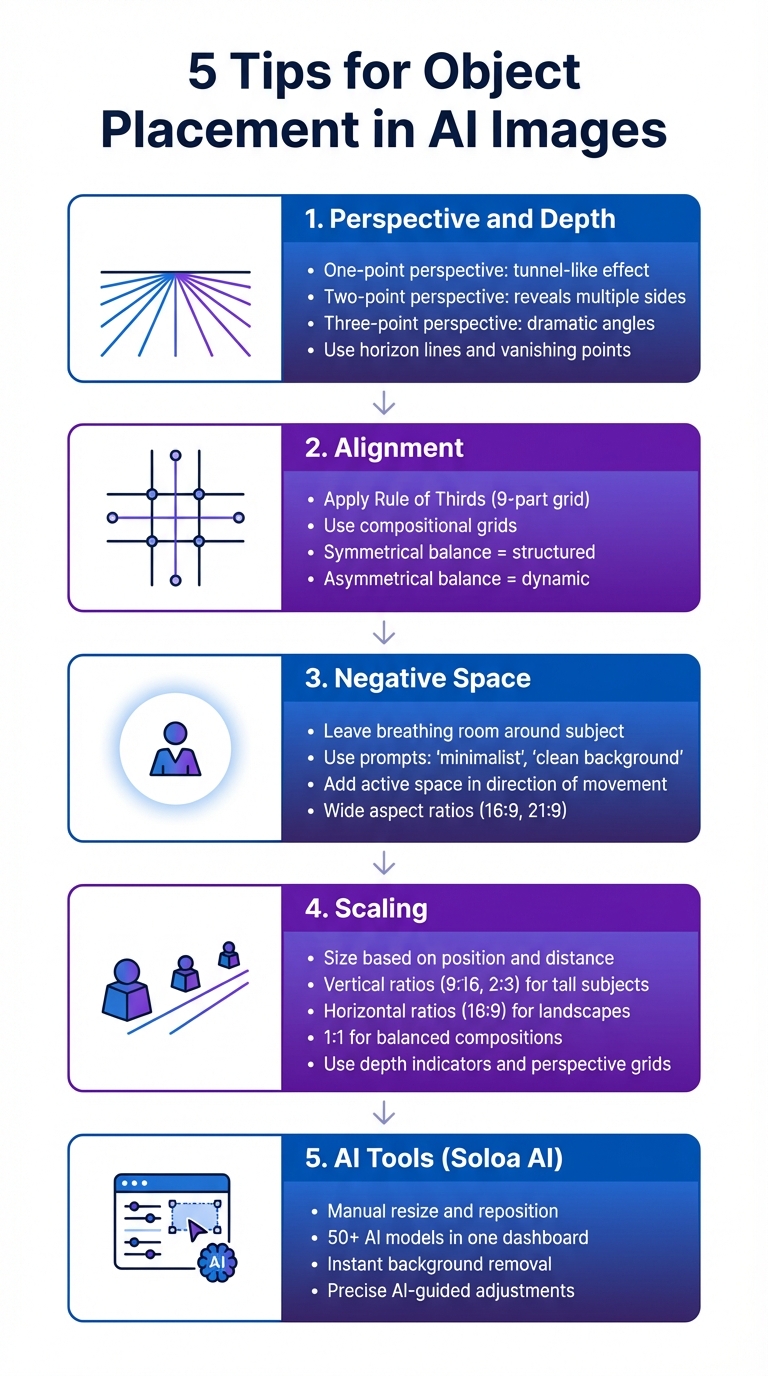
- Perspective and Depth: Use horizon lines, vanishing points, and depth cues to create realistic 3D effects in 2D images. Adjust angles like one-point, two-point, or three-point perspective for added depth.
- Alignment: Follow compositional rules like the Rule of Thirds or symmetrical grids to create balance and guide the viewer's eye.
- Negative Space: Leave empty space around your subject to frame it better and direct focus. Use prompts like "minimalist" or "clean background" to achieve this.
- Scaling: Ensure objects are sized correctly based on their position and distance in the scene. Use tools like depth indicators or perspective grids for accuracy.
- Soloa AI Tools: Platforms like Soloa AI allow manual adjustments for object placement, scaling, and lighting, ensuring precision.
5 Essential Tips for Object Placement in AI-Generated Images
Product Placement Tips For Fooocus Image Prompt/Inpaint (Stable Diffusion)
1. Apply Perspective and Depth Principles
The horizon line plays a key role in shaping how a scene is perceived - it establishes the viewer's eye level. A low horizon line gives the impression of looking up, like a child gazing at a towering monument. On the other hand, a high horizon line suggests an elevated vantage point, as if you're looking down from above. From there, vanishing points come into play, helping to translate depth onto a flat surface.
Vanishing points are where parallel lines seem to meet on the horizon, and they’re essential for creating the illusion of three-dimensional space in a two-dimensional image. For instance, one-point perspective creates a tunnel-like effect, often seen in roads or hallways. Shifting the vanishing point off-center can add a more natural and dynamic feel. Two-point perspective, which uses two vanishing points outside the frame, reveals multiple sides of an object, though placing them too close together can lead to distortion.
"Perspective is the visual depth and spatial relationship in an image – essentially, how a 3D scene is represented on a flat 2D surface." - ccollins, Generation Guide Author
For even more depth, three-point perspective introduces a third vanishing point, positioned either above or below the horizon line. This approach can create dramatic effects: a low-angle perspective makes subjects appear grand and imposing, while a high-angle perspective gives a dizzying, vertigo-like feel. Pairing these techniques with atmospheric perspective - where distant objects fade or blur - adds another layer of realism. By mastering these principles, you can create AI-generated scenes that feel more lifelike and effectively direct the viewer's attention.
2. Align Objects for Better Composition
Alignment can turn visual chaos into a well-thought-out design. When objects are arranged along imaginary lines - whether vertical, horizontal, or diagonal - they create a sense of order and balance that’s pleasing to the eye.
A classic method to achieve this is the Rule of Thirds, which divides an image into nine equal parts using two horizontal and two vertical lines. The intersections of these lines are natural focal points where the human eye is instinctively drawn. Photographer Khara Plicanic puts it this way:
"If you are tuned in to the imagery we see around us, I feel like you sort of absorb [the rule of thirds] even if you can't put your finger on it".
You can also use compositional grids to refine alignment further. For a more formal look, symmetrical balance works well, while asymmetrical balance adds a sense of movement and energy. Vinnie Wong from Piktochart highlights the difference:
"Symmetrical balance may feel more structured and comfortable... But at the end of the day, it's the asymmetrical balance that brings out true excitement in your work".
Modern AI tools make achieving precise alignment easier than ever. Advanced models like Qwen Image and Seedream 4.5 are designed to handle detailed layout instructions, ensuring consistent object placement. When working with these tools, you can guide the design by specifying preferences like "symmetrical composition", "rule of thirds", or "centered framing". For landscapes, try positioning the horizon along the top or bottom grid line to highlight either the sky or the foreground.
3. Use Empty Space to Improve Focus
Empty space, often called negative space, plays a crucial role in framing your subject and directing attention. By leaving room around your subject, you avoid a cramped composition and allow the main focus to stand out. Photographer Megan Kennedy sums it up perfectly:
"Negative space... provides a frame for the main event in an image".
When your subject is looking or moving in a particular direction, it’s important to leave active space in front of them rather than behind. This technique creates a sense of anticipation and forward movement, encouraging viewers to imagine what lies ahead. As photographer Jane Allan explains:
"The viewer's eyes go in the direction of the subject's gaze, because we want to see what they see".
To make the most of negative space, align your composition with clear prompts. For instance, when working with AI models, you can use keywords like "minimalist," "clean background," or "wide-angle lens" to create more breathing room around your subject. Negative prompts, such as "--no clutter" or "--no extra objects," are equally helpful in ensuring the frame remains uncluttered. Additionally, switching to a wider aspect ratio (like 16:9 or 21:9) can give your composition more room to breathe if it feels too tight.
The emotional tone of your image can also be influenced by how you use space. Generous negative space often conveys tranquility or even solitude, while a tighter frame can heighten tension and intensity. Balancing space thoughtfully ensures your visuals not only look appealing but also evoke the desired emotional response.
sbb-itb-7afdda7
4. Scale Objects Correctly
Getting the size of objects right is what makes AI-generated images feel real rather than artificial. Following clear scaling rules can significantly improve the realism of your compositions. The trick lies in evaluating each object's size based on its position in the scene and its distance from other elements.
Aspect ratios play a big role in maintaining spatial consistency. For instance, vertical ratios like 9:16 or 2:3 work well for tall subjects, while horizontal ratios such as 16:9 suit landscapes. A 1:1 square ratio is ideal for balanced compositions, especially since AI models tend to perform better with square images, reducing issues like distorted proportions or duplicated elements.
To ensure structural accuracy and consistent scaling, make use of tools like depth indicators, bounding boxes, and detailed technical descriptors (e.g., "shallow depth of field" or "wide shot").
When dealing with multiple objects, verification tools can be a lifesaver. For example, the Vanishing Point filter allows you to create a perspective grid by marking four corners of a plane. This automatically adjusts object sizes as they appear farther away in the background. If you're working with AI-generated scenes, using an Object LoRA trained with 10–15 clear reference images can help maintain consistent proportions across various angles and environments.
For compositing, you can refine the process by feeding a foreground mask into the generation phase. This ensures the model focuses on the specific object and its boundaries within the background. Don't forget to check that the lighting direction on the scaled object matches the rest of the scene - adjust it if it doesn't.
Once you've mastered these techniques, you can take it a step further by exploring how tools like Soloa AI allow for precise placement adjustments in your compositions.
5. Adjust Placement with Soloa AI

Soloa AI introduces a flexible, canvas-based editor designed to simplify your creative process. This platform combines more than 50 AI models - like FLUX Pro, DALLE-3, and Imagen 4 - into a single, streamlined dashboard. The result? A suite of professional-grade tools for image generation and editing, all in one place.
Its collaborative canvas empowers you to take control of your designs. You can manually resize, move, and reposition objects while refining your composition with precise AI-guided instructions. If an object’s lighting feels off, the FLUX.2 Image Modification tool can help you adjust it to match the scene while keeping the perspective intact. Plus, the instant background removal tool ensures clean cutouts, making it easier to scale and reposition elements seamlessly.
For alignment and scaling, use prompts like “make the [object] align like an official picture” to fine-tune your composition. The Nano Banana tool takes it a step further, allowing you to change an object’s surroundings without altering its key features.
"Switching between image gen, video, and chat assistants felt seamless. The interface is clean and not overwhelming."
– Mojisola Alegbe, Founder of The Engineer Network
With over 5,000 monthly active users, a 99% satisfaction rate, and potential yearly savings of more than $500 compared to juggling separate subscriptions, Soloa AI delivers a practical solution for creators who need precise control over object placement.
Conclusion
Mastering object placement can elevate AI-generated images from generic outputs to visuals that feel real and convincing. By incorporating perspective, aligning objects with intention, making smart use of negative space, and scaling elements properly, you help the AI craft scenes that look natural. As Shalwa from artsmart.ai explains:
"Realism is less about copying the real world and more about creating something that feels believable".
To take it further, use detailed prompts. For instance, instead of saying "a cat", try something like "a fluffy orange cat lounging in a sunlit room." Adding relational terms such as "behind", "next to", or "opposite", along with specific camera angles like "eye-level shot" or "low angle", can help fine-tune object placement.
For even more control, Soloa AI offers advanced tools to adjust, resize, and reposition objects while refining lighting, alignment, and scaling.
FAQs
How does perspective influence object placement in AI-generated images?
Perspective is a game-changer when it comes to placing objects in AI-generated images. It dictates how depth and spatial relationships are perceived, ultimately influencing the realism and flow of the entire scene. By altering perspective, you can adjust the camera’s position and angle, which in turn determines how objects relate to one another visually.
Let’s say you want objects in your image to feel naturally connected. Fine-tuning the perspective in your prompts can make a big difference, ensuring that objects align in a way that feels believable. This not only adds depth and balance to the image but also elevates its overall composition, making it more visually engaging and polished. Simply put, focusing on perspective is essential for crafting AI-generated images that truly stand out.
How can I ensure objects are properly scaled in AI-generated images?
To get the right scaling in AI-generated images, start by specifying the aspect ratio in your prompts. This defines the width-to-height relationship of the image, making sure it fits your intended purpose - whether that's a social media post, a presentation, or something else. You can also include details like resolution or size to help the AI deliver images that match your needs from the start.
On top of that, applying basic composition techniques - like balance, the rule of thirds, or symmetry - can make a big difference in how objects are scaled and arranged within the frame. If the result still needs fine-tuning, you can use tools for cropping or adjusting the resolution to perfect the output. By combining these approaches, you’ll end up with images that are visually appealing and scaled just right for your project.
How does Soloa AI help improve object placement in AI-generated images?
Soloa AI takes image creation to the next level by refining alignment, perspective, and spatial relationships in AI-generated visuals. Equipped with more than 50 AI-powered tools, it gives users precise control over object placement. Features like photo restoration and background removal further help adjust and perfect object positioning after the initial generation.
With its support for detailed prompt engineering, Soloa AI empowers users to define scene layouts and spatial arrangements with greater precision, resulting in designs that feel cohesive and well-balanced. Its all-in-one platform simplifies the entire process, eliminating the need to juggle multiple tools to achieve polished, professional results.
All-in-One AI Platform
Try These AI Tools Free on Soloa
50+ AI models for image, video, voice, and music. One subscription, no switching between tools.